
Tutorial ©Jascie June 15, 2007
Artwork ©Keith Garvey www.garvgraphx.com
This is an example only! Do not use his artwork without proper licensing!
Please visit garv-girlspsptubes.pinnaclecart.com for information on puchasing his artwork.
............................................................
Things you will need:
Paint Shop Pro
Animation Shop
Tube of choice
Two fonts of choice
Plugin Filter: Eye Candy 4000 - Gradient Glow
Plugin Filter: Filters Unlimited 2 - Textured Paper(optional)
............................................................
Open a new image 600x 600 transparent image, flood fill this white.
Open my template, copy & paste as a new layer.
Open your tube of choice.
Set your foreground to a medium color of choice from your tube.
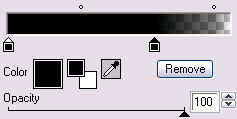
Using your magic wand with these settings:
![]()
Select the left inside portion of the template, and add a new raster layer.
Flood fill this with your medium color.
Go effects - plugins - Filters unlimited 2 - Paper Textures with settings:
Intensity 229 and Lightness 83(or settings of choice).
Or use a texture of choice.
Go select - none, then layers - merge down.
Now go effects - eye candy 4000 and use these settings:

Now add a drop shadow with these settings:
H & V=0, Opacity=65, Blur=8
Now using your favorite shape with bgcolor set at black(or light color) place a few over the textured area, convert this to a raster layer.
Go layers - merge down.
Now copy and paste your tube as a new layer positioning so that it doesnt cover too much of the middle rectangle.
Apply the same drop shadow to the tube.
Now with your text tool, add any copyrights, watermarks, ect. necessary. Convert this to a raster layer.
Now add a name to the tag (see header for example) making sure its not covering too much of the middle rectangle. Convert this to a raster layer.
Add the same gradient glow and drop shadow as above.
Now hide your background layer.
Using you crop tool, in the tools options select the merged opaque button, then click the checkmark.
Unhide you background layer once again.
Resize all layers to your desire.
Now select your font of choice(for the animated text) and use these settings:
![]()
![]()
Write out a fav word or saying(the leading and kearning settings may have to be adjusted to suit your font), making sure that the text is completely inside the middle rectangle and not on your tube. Convert this to a raster layer.
Now go edit copy and paste as a new image. Add a new raster layer and flood fill black. Move this layer to the bottom.
Go edit copy merged.
Open animation shop and paste as a new animation.
Now go effects - insert image effect. In the effect drop down menu click on Fade to Grey, and click OK.
Now go edit - copy. Now paste as a new animation.
Go edit select all, then go animation - reverse frames. Go edit - copy.
Now go back to the original animation and click on frame 21, delete this frame.
Now right click frame 20 and select: paste after current frame.
Now click on frame 41 and delete this frame.
Now go back to your psp.
In your main tag image, delete the animated text layer, then go edit - copy merged.
In Animation Shop, paste this as a new animation.
Go edit - duplicate selected, until you reach 40 frames.
Now go edit - select all.
In your text animation(40 frames), go edit select all then edit copy.
Back in the tag animation go edit - paste into selected frame.
Position with your mouse so it sets into the middle rectangle, and not overlapping your tube.
Now go view - animation to make sure it looks ok.
Now Save it!
Ta Da! You're Done!
............................................................
Feel free to text link only or print out for own personal use. But do not copy it in anyway to put online, pass out, use for profit or rewrite without my permission.