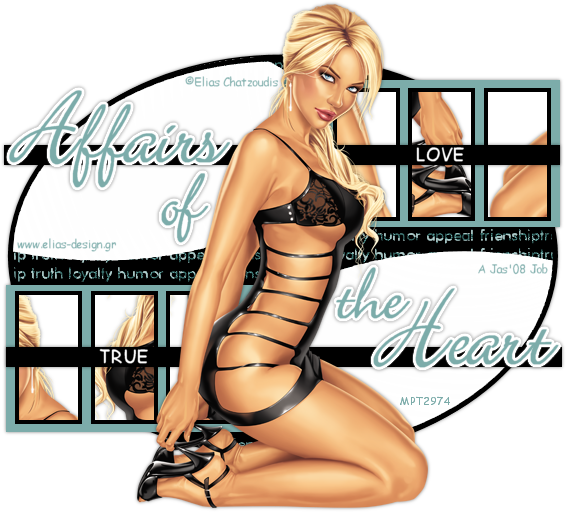
Tutorial ©Jascie April 5, 2008
Artwork ©Elias Chatzoudis at www.elias-design.gr
This is an example only! Do not use his artwork without proper licensing!
Please visit EliasArtShop.com for information on puchasing his artwork.
............................................................
Things you will need:
Paint Shop Pro
Tube of Choice
Fonts of Choice
............................................................
Open a new image 600 x 600 with a white background. Copy and paste your tube as a new layer.
Go to your background layer. In your materials palette set your background to a dark color from your tube and the foreground to a medium color.
Go to your preset elipse tool with the stroke set at 0. Draw out a large elipse (see header tag for example). Go objects - align - center in canvas. Convert this layer to a raster layer.
In your materials palette switch your foreground and background colors. Go to your text tool, with a font of choice, size set between 10 -14, vector and stroke of 0. Type out 5 words that suit your tube, select them in the box with your cursor, right click and select copy, add a space then go control + v to paste the words. Repeat this until it is wide enough to cover the width of your elipse. Now with the whole line repeat the copy and paste as above, until its long enough to cover the length of the elipse. Click ok, then go objects - align - center in canvas. Duplicate this layer, then go layers - merge - merge down. Convert to a raster layer. Dont worry about the overhang we will take care of in a future step.
Back in your materials palette, switch your foreground and background colors, set the background to white. Now go back to your preset elipse tool, and draw out a smaller elipse and place onto the top left of first elipse. Convert this to a raster layer. Now duplicate this layer. Then go image - mirror, then image - flip. Now go layers - merge - merge down. In your layers palette, hide your background layer.
Back in your materials palette switch your foreground and background colors. Hide your background color and set your foreground color to your dark color once more. Go to your preset elipse shape tool, with the stroke set at 5. Draw another elipse, about the same size as the bottom elipse. Go objects - align - center in canvas. Adjust the edges if need be so the elipse encircles the edges of the bottom elipse. Convert to a raster layer.
Now go to the bottom elipse layer, with your magic wand tool select the outside of the elipse. Go selections - invert, then selections - modify - contract by 2. Go to your white elipse layer, go selections - invert, then edit - cut. Now repeat this with your text layer. Go selections - select none.
Hide your tube. Now merge all remaining layers visible. Go effect - 3D effects - drop shadow with these settings:
H & V: 0, Opacity: 50, Blur: 5, Color: Black.
Now duplicate this layer. Go effects - distortion effects - ripple, with these settings:
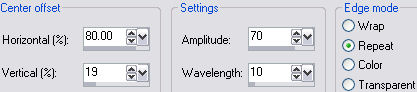
Set the blend mode of this layer to soft light. Now go back to the original layer. With your magic wand select the outside of your elipse. Go selections - invert, then selections - modify contract by 8, then selections - invert. Go to the ripple layer, and go edit - cut. Go selections - select none. Merge these two layers visible. Unhide all your layers.
Now add a new raster layer. Go to your preset rectangle selection tool. Select a long rectangle, from the top center to over the right edge of the elipse (see header for example).
In your materials palette switch your foreground and background colors. Unhide the foreground and set to your medium color. Flood fill the selection. Go selections - select none.
Now hide all other layers. Add a new raster layer. With your rectangle selections tool draw a small rectangle inside one end of the bigger rectangle. In your materials palette switch your background and foreground colors. Flood fill the selection with your dark color. Go selections - select none. Duplicate this layer 2 or 3 times, aligning each duplicate beside the other inside the bigger rectangle.
Merge all layers visable. Duplicate this layer. Then go image - mirror, then image - flip. Merge these two layers visable.
Now with your magic wand, hold down the shift key and select the inside of all of your smaller rectangles. Go selections - modify - contract by 4. Flood fill each selection with white. Go selections - select none.
Now using your magic wand tool, select the inside of one of the white rectangles. Now go to your tube, copy, and go Shift + D, and close the original. Go image - mirror. Then edit - copy. Paste this as a new layer in your new tag image. Postion to desire in the selection. Then go selections - invert, then edit - cut. Then selections - select none. Repeat this with the tube for each white rectangle.
Once finished, hide your merged rectangle layer. Merge these layers visable. Add a drop shadow with the same settings as before. Unhide and go to your white layer, with your magic wand select all of the white rectangles. Go selections - invert. Go back to your rectangle tube layer, then go edit - cut. Go selections - select none. Then layers - merge - merge down.
Now add a new raster layer. Go to your rectangles selection tool, and draw out a narrow rectangle from the edge of the left bottom rectangle to over the right edge of the elipse (see header tag for example). Flood fill this with your dark color. Go selections - select none. Duplicate this layer. Now go image - flip, then image - mirror. Go layers - merge - merge down. Unhide all your layers. Add the same drop shadow to this layer, your merged picture layer, and your tube.
Now time to add some text. With your favorite printing font, color set at white, type out a word that suits your tube. Convert this to a raster layer, and position over one of your narrow rectangles. Repeat once more using a different word.
Now with your favorite font, colors of choice, and the stroke set at 2 or 3, type out your name. Convert to a raster layer, and position to desire. Add the same drop shadow as before. Now add any copyrights, license information, etc. needed.
Now hide your white background. Go to your crop tool, click on the merged opaque button, then the check mark. Unhide your white background.
If need be resized, with all layers checked.
Now Save it!
Ta Da! You're Done!
............................................................
Feel free to text link only or print out for own personal use. But do not copy it in anyway to put online, pass out, use for profit or rewrite without my permission.